 how-to
How to Plan a Custom Lighting Layout for Small Rooms
Table of Contents
- Start With a Lighting Plan, Not a Fixture List
- Measure the Room Before You Choose Anything
- Build Three Layers: Ambient, Task, and Accent
- Recessed Lighting Layout for Small Rooms: Spacing Math That Works
- Position Fixtures Around Beds, Desks, and Seating
- Small Bedroom Lighting Layout: A Worked Example
- Pick Light Output and Color Temperature Before You Buy
- Set Switching, Dimming, and Control Zones
- Your Electrical Rough-In Lighting Checklist
- Frequently Asked Questions
Last Updated: October 21, 2026
Start With a Lighting Plan, Not a Fixture List
A lighting layout is a measured map of where each light goes, what it does, and how it switches, not a shopping list of fixtures.
Small rooms punish guesswork. A fixture that looks right in the showroom can throw harsh shadows across a desk or leave a dark corner behind a door.
Below, we'll show you exactly how to build that plan in eight steps. But first, here's what most guides get wrong: they treat fixture placement as a style question. It's a math question.
Measure the Room Before You Choose Anything
Grab a tape measure and a notebook before you look at a single fixture. Write down four numbers:
- Floor dimensions: length and width in feet
- Ceiling height: floor to ceiling, in feet and inches
- Wall space: where doors, windows, and closets interrupt the walls
- Bed, desk, and seating positions: where furniture will actually sit
Those four numbers decide almost everything that follows. Ceiling height sets your recessed spacing. Wall space limits where sconces can go. Furniture positions tell you where task lighting belongs.
A common mistake is measuring the room but not the furniture. A desk lamp is useless if the desk sits six feet from the only outlet. Sketch a quick floor plan and mark outlet locations while you're at it.
Build Three Layers: Ambient, Task, and Accent
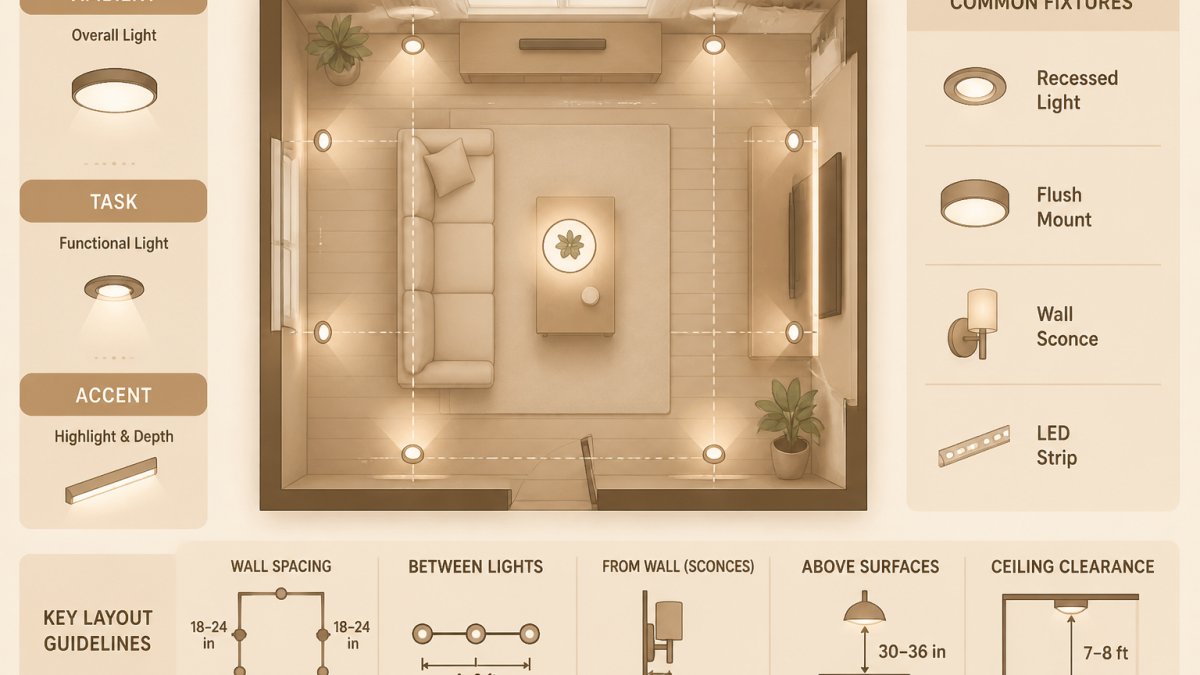
Every well-lit room uses three layers, and small rooms need all three more than large ones do. Ambient lighting fills the room with general light. Task lighting puts focused light where you work.
Here's how each layer earns its place in a small room:
- Ambient: ceiling fixtures or recessed lights that wash the whole room evenly
- Task: desk lamps, under-cabinet strips, or reading lights at the bed
- Accent: wall lights, picture lights, or a pendant used as a feature
The layers matter because a single bright ceiling light flattens a room. It lights everything and highlights nothing. Three layers give you control: bright for cleaning, soft for evenings, focused for work.
Custom lighting design work often starts with this layering question. It shapes the wiring plan before a single fixture is ordered.
Recessed Lighting Layout for Small Rooms: Spacing Math That Works
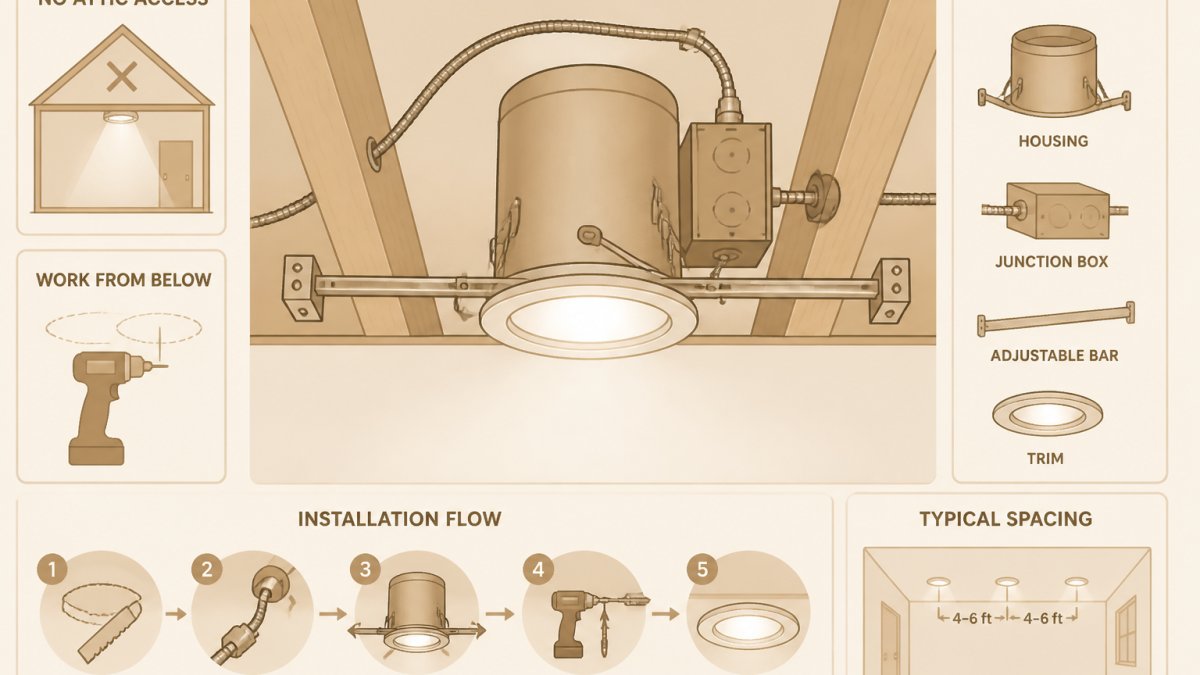
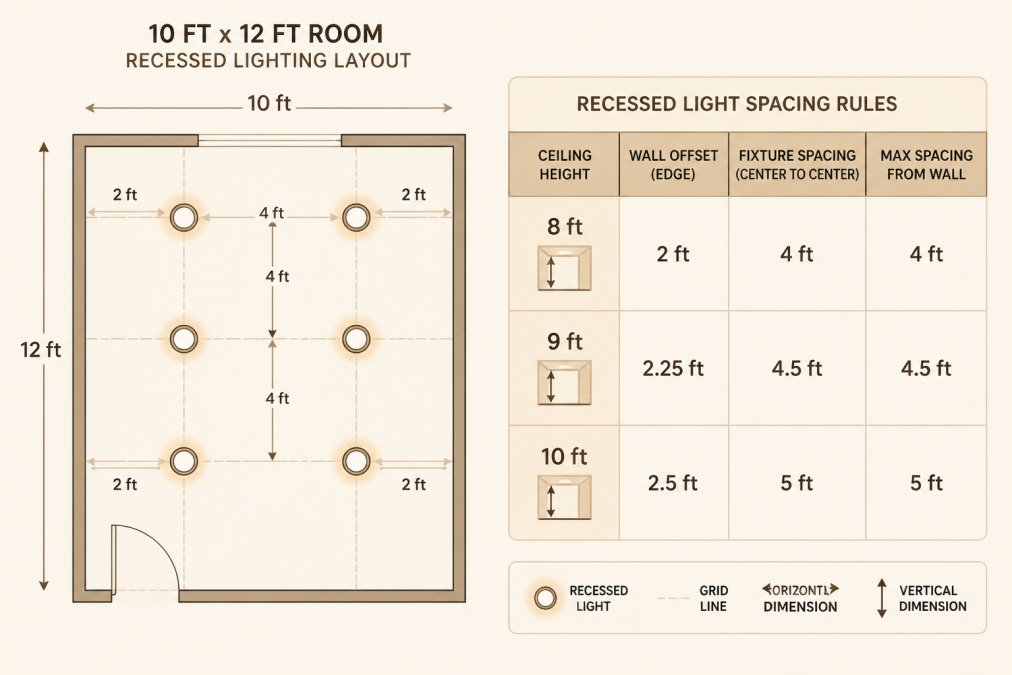
A recessed lighting layout for small rooms follows one rule: space fixtures so their light cones overlap before they hit the floor.
The math behind it is simple. Divide your ceiling height by two to get the distance from the wall to the first row of lights. Then use the same number as the gap between fixtures.
| Ceiling Height | Distance From Wall | Spacing Between Fixtures |
|---|---|---|
| 8 ft | 2 ft | 4 ft |
| 9 ft | 2.25 ft | 4.5 ft |
| 10 ft | 2.5 ft | 5 ft |
One more rule: keep recessed lights out of the first 12 inches from a wall. Any closer and the light grazes the wall, which creates glare and a hot spot.
Why the Half-Height Rule Works
The half-height rule is really a beam-overlap rule in disguise. A typical residential recessed downlight has a beam angle between 60 and 90 degrees. At an 8-foot ceiling, a 60-degree beam spreads to roughly 9 feet across at floor level; a 90-degree beam spreads wider but softer.
If you use a narrow-beam fixture (say 40 degrees) on an 8-foot ceiling, the same 4-foot spacing leaves gaps between cones. In that case, either tighten the spacing to about 3 feet or switch to a wider-beam trim.
Adjusting the Grid for Room Shape
A square room takes a simple grid. A long, narrow room does not. For a room that is more than about 1.5 times longer than it is wide, use two parallel rows rather than one center row, and keep the rows the same distance from the long walls as your wall offset.
For very small rooms, under about 80 square feet, four recessed lights on a 4-foot grid often over-light the space. Two or three wider-beam fixtures plus a task layer usually look better and cost less to wire.
Clearance and Joist Checks
Before you finalize any grid, confirm each fixture clears joists, ductwork, and plumbing. A recessed housing needs roughly 5 to 6 inches of clearance above the ceiling in most residential cans, and some insulated-ceiling (IC-rated) housings need more. Shift a fixture by 6 inches rather than notching a joist.
Position Fixtures Around Beds, Desks, and Seating
Place task lights so your body doesn't cast a shadow on your own work. For a desk, put the light on the side opposite your writing hand.
Seating areas need light from two directions. A floor lamp behind one chair and a wall light on the opposite wall removes the flat, single-source look.
Watch for screen reflections. A light directly behind a monitor or in the viewer's line of sight causes glare on the screen.
Get your free electrical estimate →
Small Bedroom Lighting Layout: A Worked Example
Here's a small bedroom lighting layout for a 10 ft by 12 ft room with an 8-foot ceiling. It shows how the layers fit together in practice.
- Ambient: four recessed lights on a 4-foot grid, 2 feet from each wall
- Task: two wall-mounted reading lights above the headboard, 3.5 feet apart
- Accent: one pendant or wall light opposite the bed for depth
- Control: ambient on one dimmer, reading lights on a separate switch
Four recessed lights cover a 120-square-foot room well at that spacing. The reading lights sit on their own switch so one person can read while the other sleeps.
Adjust the count for room shape. A long, narrow bedroom may need five or six smaller recessed lights in two rows instead of four in a grid.
Pick Light Output and Color Temperature Before You Buy
Choose color temperature first, then brightness, then color rendering. Warm light (2700K to 3000K) suits bedrooms and living rooms. Cool light (3500K to 4000K) works better in kitchens, bathrooms, and home offices. Neutral 3000K to 3500K is a safe middle for a room that serves several purposes.
Brightness is measured in lumens, not watts. For ambient lighting in a small room, aim for roughly 10 to 20 lumens per square foot. A 120-square-foot bedroom lands around 1,200 to 2,400 lumens total, split across your fixtures.
A Worked Lumen Calculation
Take the 10 ft by 12 ft bedroom from the worked example: 120 square feet. At 15 lumens per square foot, the ambient target is 1,800 lumens. Four recessed fixtures means about 450 lumens each, which is a common output for a 4-inch or 5-inch LED downlight. If you choose 800-lumen fixtures instead, three will hit the target and the fourth becomes optional accent. Run this math before you buy so you are not guessing at fixture counts.
Color Rendering Matters More Than You Think
Color rendering is measured by CRI, the color rendering index. A CRI of 90 or higher makes skin tones, wood, and fabric look natural; a CRI in the 80s is common in budget fixtures and can make a warm room look slightly gray or green.
Keep color temperature consistent within a room. Mixing warm and cool sources in one space makes every surface look slightly off, and most people notice it without knowing why.
Beam Angle and Dimming Compatibility
Beam angle affects how the light reads in a small room. A wide beam (60 to 90 degrees) washes a wall evenly and is the right choice for ambient downlights. A narrow beam (25 to 40 degrees) is for accenting art or a plant, not for general light. Match the beam to the job, then match the fixture to the dimmer: most LED dimmers require a compatible driver, and a mismatch causes flicker or a limited dimming range.
Set Switching, Dimming, and Control Zones
Split your lights into zones so one switch doesn't turn everything on at once. A practical small-room setup uses three zones:
- Ambient zone: ceiling and recessed lights, on a dimmer
- Task zone: desk, bed, or counter lights, on their own switch
- Accent zone: feature lights, ideally dimmable and separate
Dimmers are the highest-value upgrade in any lighting plan. They let one room serve as a bright workspace by day and a soft living space at night.
Plan the switching before the electrical rough-in. Adding a switch leg after the drywall goes up means cutting walls, and that's the kind of surprise that blows a renovation budget.
Your Electrical Rough-In Lighting Checklist
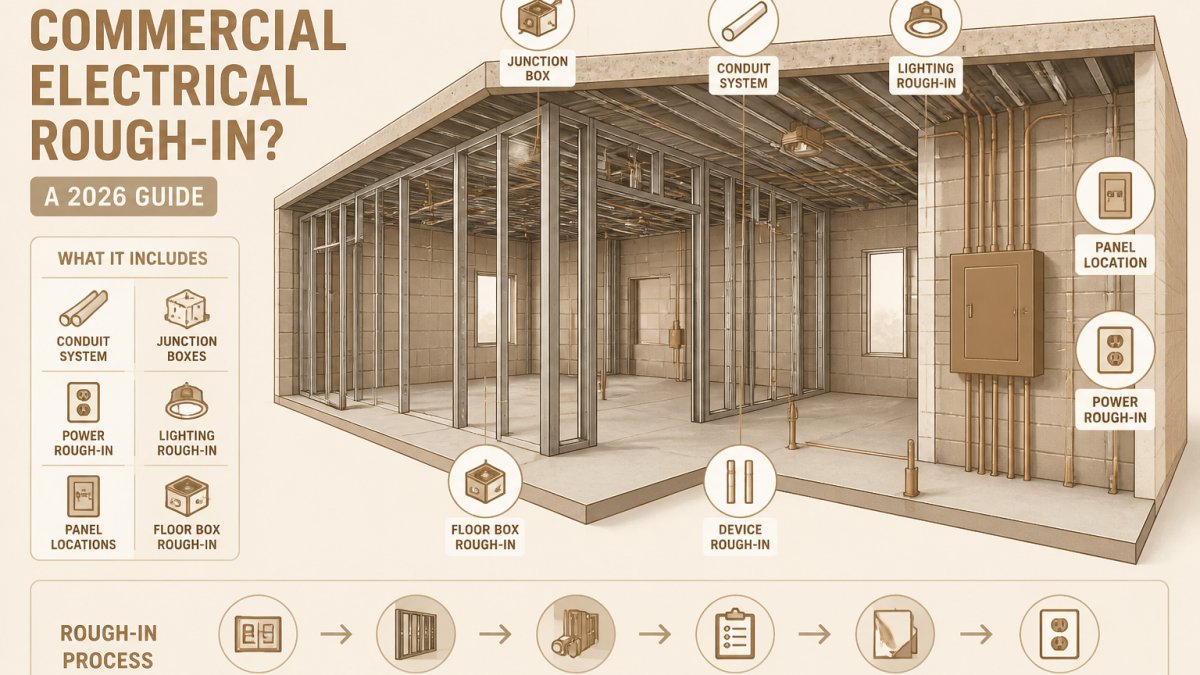
An electrical rough-in lighting checklist keeps the plan honest once the walls open up. Run through this list before drywall closes the ceiling:
- Confirm fixture locations against the measured floor plan
- Verify ceiling height at each fixture point, including soffits
- Mark switch locations at every room entrance
- Confirm dimmer compatibility with the chosen fixtures
- Check that recessed lights clear joists and ductwork
- Verify outlet locations near desks and beds
- Confirm wall light boxes sit at the right height for furniture
- Match every fixture to its switch zone on the plan
- Confirm the circuit can carry the total fixture load
- Schedule the inspection before drywall goes up
That last item matters. Electrical work falls under the National Electrical Code, and local inspectors check rough-in before walls close. The NFPA 70 National Electrical Code sets the baseline rules most jurisdictions adopt.
If the checklist feels like a lot, that's because it is. A missed step here costs far more to fix later than to get right now.
A lighting plan only works if the wiring behind it is right. One missed switch leg or an overloaded circuit can turn a good design into an expensive redo.
Frequently Asked Questions
How many lights should a small room have?
For a small room, work from lumens rather than a fixture count. A common target is roughly 10 to 20 lumens per square foot for ambient light, so a 120-square-foot bedroom needs about 1,200 to 2,400 lumens total. A 6-inch recessed LED at 800 lumens means two to three cans cover ambient light, with wall lights or a pendant adding task and accent layers. Add dedicated task lighting over desks and bedsides so you are not over-lighting the whole ceiling to brighten one spot.
Where should recessed lights go in a small room?
Keep recessed lights about 2 feet off the walls and space them 3 to 4 feet apart for an 8-foot ceiling. Measure from the wall to the center of the first fixture, then divide the remaining distance evenly. Avoid placing a can directly above where you sit or sleep, since that casts shadows on your face and creates glare. In a small room, fewer well-placed fixtures beat a dense grid that washes out the walls and kills the layered look.
What should be included in an electrical rough-in plan for lighting?
An electrical rough-in lighting checklist should list every fixture location with dimensions from two walls, switch and dimmer locations, the circuit each fixture lands on, wire gauge, and box type. Include ceiling height, joist direction, and any blocking needed for pendants or heavy fixtures. Note control zones so the electrician can pull the right number of switch legs. Getting this on paper before drywall goes up prevents change orders and rework after inspection.
Should small rooms use warm or cool lighting?
Use 2700K to 3000K warm light in bedrooms and living areas for a relaxed feel, and 3500K to 4000K in work areas like desks or kitchens where you need alertness. Keep one color temperature per room, or per control zone, so the space does not look patchy. Check the bulb's color rendering index too: 90 CRI or higher makes skin tones and fabrics look natural, which matters more in a small room where every surface is close to the light.