 how-to
Can You Install Smart Home Security Wiring Yourself?
Table of Contents
- Can You Install Smart Home Security Wiring Yourself?
- How to Wire a Home Security System: Step-by-Step
- Home Security System Low Voltage Wiring Explained
- Tools for Installing Security System Wiring
- Wired vs Wireless Home Security System: Which Fits Your Home?
- Cost, Time, and When to Call a Licensed Electrician
- Frequently Asked Questions
Last Updated: October 15, 2026
Can You Install Smart Home Security Wiring Yourself?
Yes, you can install smart home security wiring yourself in many cases, but it depends on your home's layout, your comfort with low-voltage work, and local code rules. This guide from Light Life Electric covers the steps, tools, and where a licensed electrician should take over.
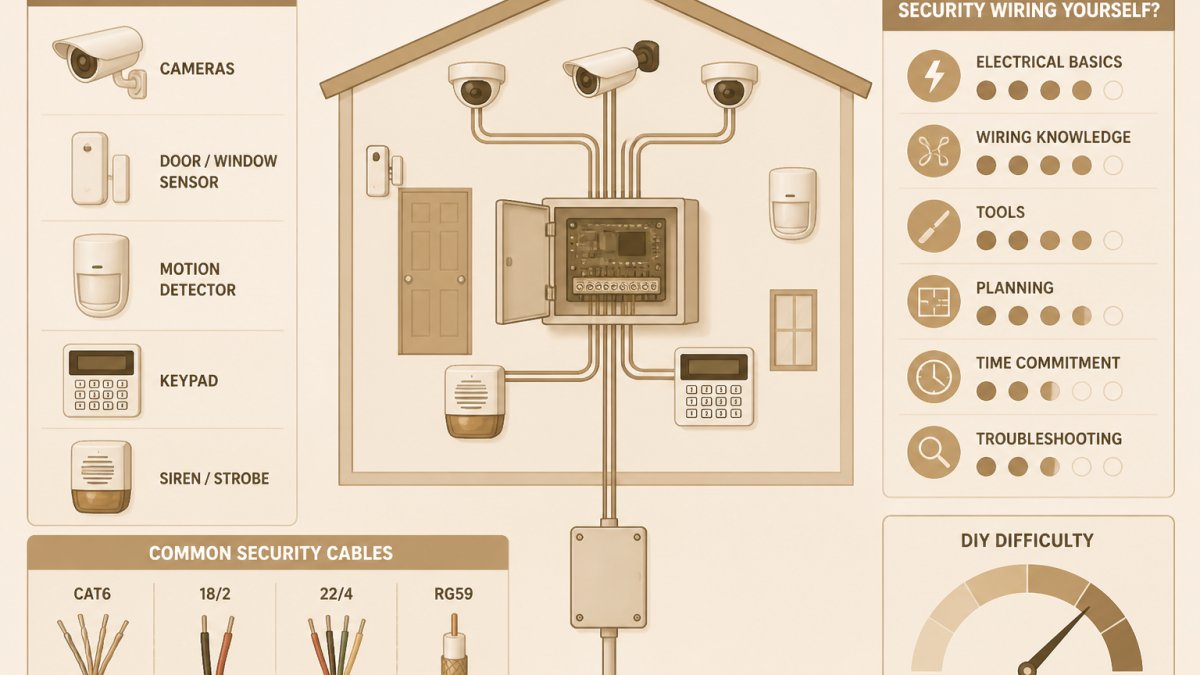
Security wiring is the low-voltage cabling that connects door contacts, window sensors, motion detectors, and cameras back to a central alarm panel. It carries data and small amounts of power, not the 120-volt current that runs your outlets.
Most homeowners can handle planning, sensor placement, and cable runs. The tricky parts are retrofitting finished walls and tying into power safely.
When DIY Makes Sense and When It Doesn't
DIY makes sense with open framing, an unfinished basement, or easy attic access.
Here is the honest split:
- DIY-friendly: surface-mounted cable, open-stud basement runs, attic drops into interior walls, replacing an old wired panel with a new one
- Pro territory: fishing cable through closed walls, adding a dedicated circuit, drilling through fire blocks, any work near the main electrical panel
A common mistake is assuming "low voltage" means "no rules." Many jurisdictions require a permit for alarm installation, and some require a licensed alarm contractor.
For the electrical safety side, the U.S. Consumer Product Safety Commission home electrical safety guidance is a solid starting point on what should stay in a licensed electrician's hands.
How to Wire a Home Security System: Step-by-Step
Wiring a home security system means running low-voltage cable from each sensor and camera back to a central panel, then connecting and testing everything. The path changes per home, but the sequence stays the same:
- Plan sensor and camera locations on paper first
- Pick the control panel location (a closet, utility room, or basement near power)
- Map your cable routes through attic, basement, or crawlspace
- Drill and run cable from each device back to the panel
- Label every cable at both ends as you go
- Mount sensors and cameras at their final spots
- Terminate wires at the panel and at each device
- Connect power and backup battery
- Test every zone before you close up walls
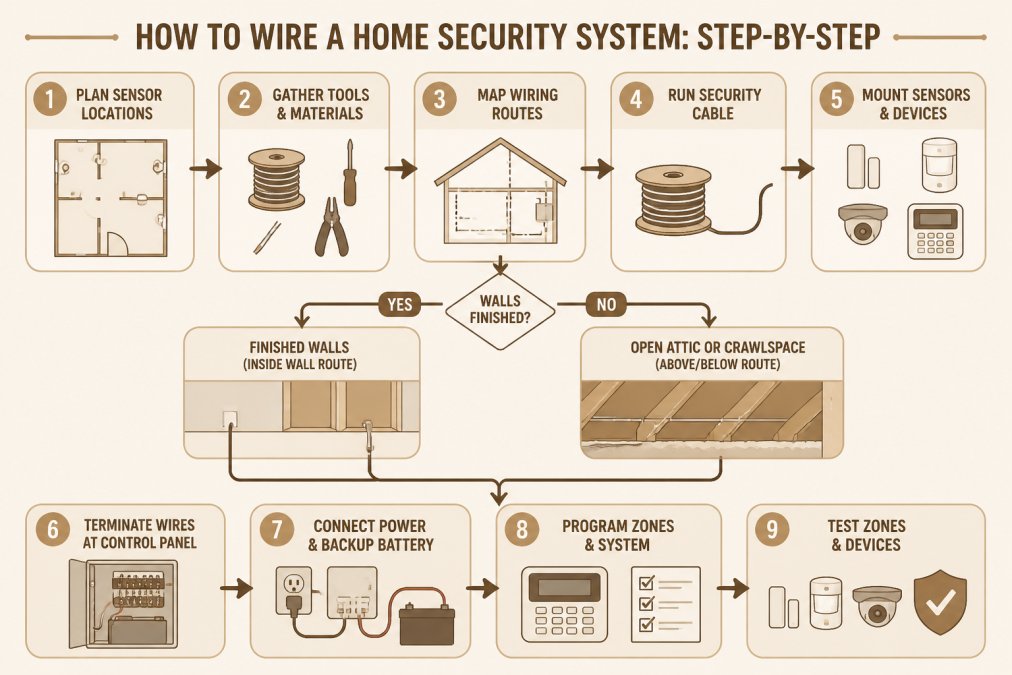
The biggest time-saver is labeling. Installers can spend an hour tracing unlabeled cable, so label both ends the moment you pull it.
Retrofitting Finished Walls Without Cutting Drywall
Retrofitting finished walls is the hardest part of DIY security wiring. You have three realistic options, and only two avoid major drywall repair.
- Surface raceway: plastic channel that hides cable on the wall's face. Fast, cheap, and visible. Good for basements and garages.
- Fish tape and a flexible bit: feed cable through the wall cavity from attic or basement using a fish tape and a long flexible drill bit. Works when you have top or bottom access.
- Magnetic pull tools: use magnets to guide cable through insulated or blocked cavities.
What most guides miss is the fire-block problem: many walls have horizontal blocking that stops a fish tape cold. You either cut a small access hole and patch it, or call a pro.
Home Security System Low Voltage Wiring Explained
Home security system low voltage wiring runs on 12 to 24 volts, well below the 120 volts in your outlets.
Low-voltage wiring carries under 50 volts, used for alarms, thermostats, doorbells, and network cable.
A few practical rules:
- Use the gauge the panel manufacturer specifies, not whatever is on sale
- Keep runs under the manufacturer's maximum length for reliable signal
- Avoid running alarm cable parallel to power cable; cross at 90 degrees if you must
Voltage drop is the quiet killer: a run that is too long or too thin can cause sensors to drop offline. If a zone keeps failing, suspect the cable before the sensor.
Tools for Installing Security System Wiring
The tools for installing security system wiring are modest, and most homeowners already own half of them. You do not need a full electrician's kit.
What you'll need:
- Cordless drill with a long flexible bit
- Fish tape or glow rods
- Stud finder with live-wire detection
Nice to have: a magnetic cable puller, a tone generator for tracing, and a drywall saw for clean access holes.
Skip the cheapest multimeter. A $15 meter that reads continuity reliably is fine; a broken one costs hours of guessing.
Get your free electrical estimate →
Wired vs Wireless Home Security System: Which Fits Your Home?
Wired and wireless systems each win in different homes. Wired wins on reliability and long-term cost; wireless wins on speed and retrofits. The choice also drives which panels, sensors, cameras, and smart-home platforms you can use.
| Feature | Wired System | Wireless System |
|---|---|---|
| Reliability | Very high, no signal loss | Depends on signal strength and interference |
| Retrofit difficulty | High in finished homes | Low, no cable runs |
| Power | Wired, with backup battery at panel | Battery per device, replaced every 1-5 years |
| Best for | New builds, open walls, long-term owners | Finished homes, renters, quick installs |
| Long-term cost | Lower after install | Higher, battery replacements and device churn |
| Protocol options | Hardwired zones, plus hybrid panels that also accept wireless | Z-Wave, Zigbee, Wi-Fi, proprietary RF, Thread |
Compatibility and smart-home integration
Most modern panels are hybrid: they accept hardwired zones and wireless sensors on the same board. That lets you wire the easy runs (doors, basement windows) and go wireless where fishing is impractical (second-floor windows, detached garage).
Key compatibility questions to answer before you buy:
- Panel-to-sensor: Does the panel support the sensor's protocol (hardwired loop, Z-Wave, Zigbee, proprietary RF)?
- Panel-to-camera: Does the panel integrate with your camera brand, or do you need a separate NVR and app?
- Panel-to-hub: Does it work with Amazon Alexa, Google Home, Apple Home, or SmartThings, and at what level (arming only, or full sensor visibility)?
A common pattern is keeping the existing hardwired sensors and swapping only the panel, which preserves the cable runs and cuts retrofit work dramatically.
Testing, troubleshooting, and maintenance
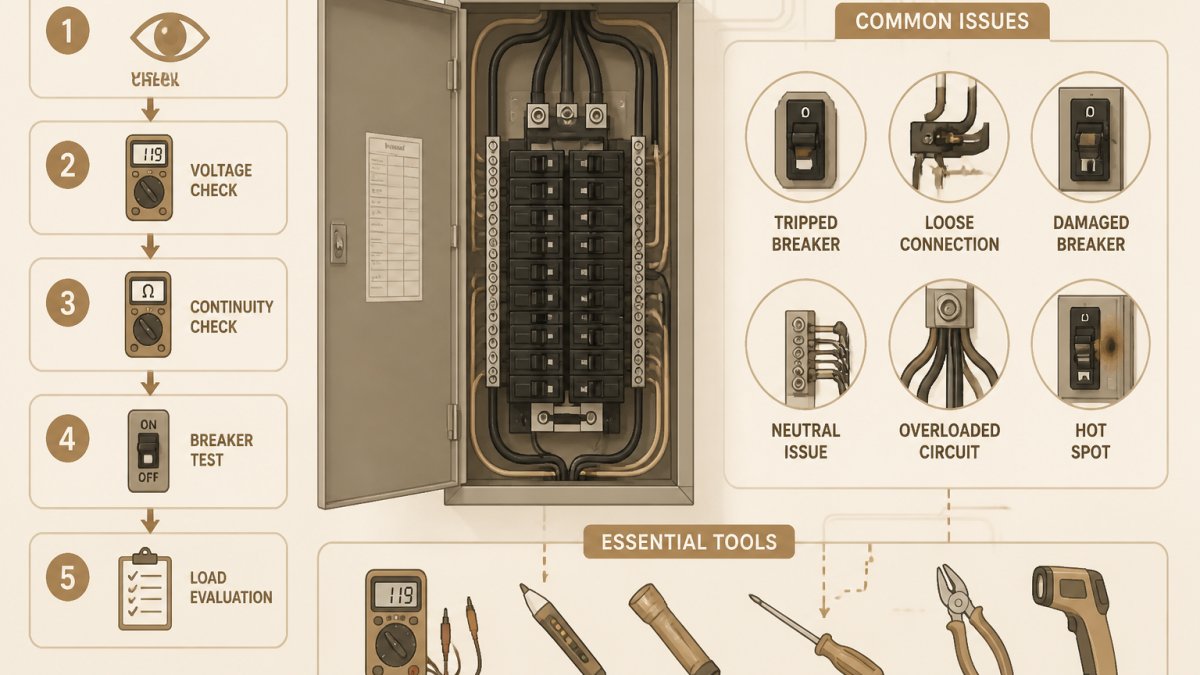
Commissioning is where DIY installs most often fail. Before closing up walls or mounting anything permanently, walk through this sequence:
- Continuity test every run with a multimeter before terminating at the panel.
- Zone-by-zone walk test: trigger each sensor and confirm the correct zone reports at the keypad and in the app.
- Power backup test: unplug the transformer and confirm the battery carries the panel and that a low-battery alert fires.
- Connectivity test: verify Wi-Fi or cellular backup, and confirm push notifications reach your phone within a few seconds.
- Camera test: check live view, motion zones, night vision, and recording playback.
- Siren and strobe test: confirm audibility in bedrooms and that the outdoor siren triggers.
Common faults and fixes:
- Zone stays open: check the contact gap, magnet alignment, and end-of-line resistor value.
- Zone stays closed: suspect a broken conductor, a bad splice, or a reversed pair.
- Intermittent zone: usually a loose staple pinching the cable or a marginal voltage drop on a long run.
- Camera drops offline: check PoE budget, cable length, and whether the run exceeds the manufacturer's limit.
Monitoring, privacy, and cybersecurity
Decide up front between self-monitoring (you get the alerts, you call 911) and professional monitoring (a central station dispatches). Self-monitoring is free or low-cost; professional monitoring typically runs $15-$60 per month depending on contract length and cellular backup.
Security hygiene matters as much as the wiring:
- Change the default installer code and admin password on day one.
- Enable two-factor authentication on the panel account and camera app.
- Put cameras on a separate VLAN or guest network so a compromised camera cannot reach your computers.
- Keep firmware updated; many panels and cameras ship with known vulnerabilities that get patched later.
Cost, Time, and When to Call a Licensed Electrician
Cost and time for DIY security wiring depend on your home's size, access, and device count. Confirm current pricing before you buy.
DIY material costs
- Alarm cable (22/4 or 18/4, 500 ft spool): roughly $60-$120
- Door/window contacts (per unit): roughly $3-$12 for basic recessed or surface contacts
- PIR motion sensors: roughly $20-$60 each
- Wired IP or analog cameras: roughly $40-$250 each depending on resolution and night vision
Professional installation comparison
A licensed low-voltage or alarm contractor typically quotes a flat rate per device:
Retrofit work in a finished home can add 30-60% to labor for fishing, patching, and paint touch-up.
Time estimates by home type
- New construction, open walls: 4-8 hours for a basic 8-zone system
- Home with unfinished basement or easy attic access: 1-2 weekends for a DIYer
- Finished single-story home, partial access: 2-3 weekends
- Finished two-story home, no attic or basement access: 3-5 weekends, or a pro crew for 1-2 days
When to call a licensed electrician
Call a licensed electrician or licensed alarm contractor when:
- You need a new circuit or any work at the main electrical panel
- You are drilling through fire blocks, top plates, or structural members
- Your state or local code requires a licensed alarm contractor for permitted work
- You want concealed cable in a fully finished home and do not want to patch drywall
At Light Life Electric, we handle the whole job, from permits to final inspection. Our Florida certified electricians are licensed, bonded, and insured, and we offer 24/7 emergency response if something goes wrong mid-project. For code and permit questions, the National Fire Protection Association overview of NFPA 72 fire alarm code explains why alarm wiring rules exist and where they apply.
If you would rather not guess, the U.S. Department of Energy guide to home electrical safety covers the basics of safe home electrical work.
Frequently Asked Questions
Are home security systems low voltage?
Yes, most home security systems run on low voltage, typically 12 to 24 volts DC or AC. This low voltage is what makes DIY security wiring less dangerous than standard 120-volt electrical work. However, low voltage does not mean no rules. You still need to follow the National Electrical Code (NEC) for Class 2 and Class 3 circuits, keep cables away from high-voltage lines, and use proper connectors. Always check local building codes before starting.
What tools do you need to install smart home security wiring?
You will need a stud finder, drill with a 3/8-inch bit, fish tape, wire strippers, a voltage tester, and a screwdriver set. For low-voltage wiring, use 22/4 or 18/4 security cable. A cable tester helps verify connections. If you are retrofitting finished walls, a flexible drill bit and magnetic wire puller save time. Safety gear like gloves and goggles is also important. Most tools are available at hardware stores.
How much does a wired security system cost?
For an exact quote on your property, contact a licensed electrician like Light Life Electric for a free estimate.
Can you install a wired security system yourself?
You can install a wired security system yourself if you are comfortable with basic wiring, drilling, and following instructions. The job involves running low-voltage cable, mounting sensors, and connecting to a control panel. However, if your home has finished walls, old wiring, or you need to tie into your electrical panel, hire a licensed electrician. Permits may also be required. Light Life Electric offers free estimates for professional installation.
Wiring your own security system is doable when your walls are open and your code allows it. When they are not, the time and risk add up fast. Light Life Electric handles the full job, from permits to final inspection, with code-compliant work and minimal disruption. Get your free electrical estimate and let our licensed team handle the wiring so your system passes inspection the first time.