 how-to
How to Install Recessed Lighting Without Attic Access
Table of Contents
- Plan Your Layout and Check Ceiling Joists
- Choose the Right Fixtures for a Finished Ceiling
- How to Run Wire for Recessed Lights Without Attic Access
- Cut Ceiling Openings and Fish Cable Through Joist Bays
- Electrical Permits for Recessed Lighting and When to Hire an Electrician
- Troubleshooting Blocked Joist Bays and Circuit Capacity
- Conclusion
- Frequently Asked Questions
Last Updated: October 18, 2026
Plan Your Layout and Check Ceiling Joists
Recessed lighting is a simple upgrade, but installing it without attic access takes planning. You cannot crawl above the ceiling to drill or route cable. Every move happens through small holes below. The plan matters more than the drill.
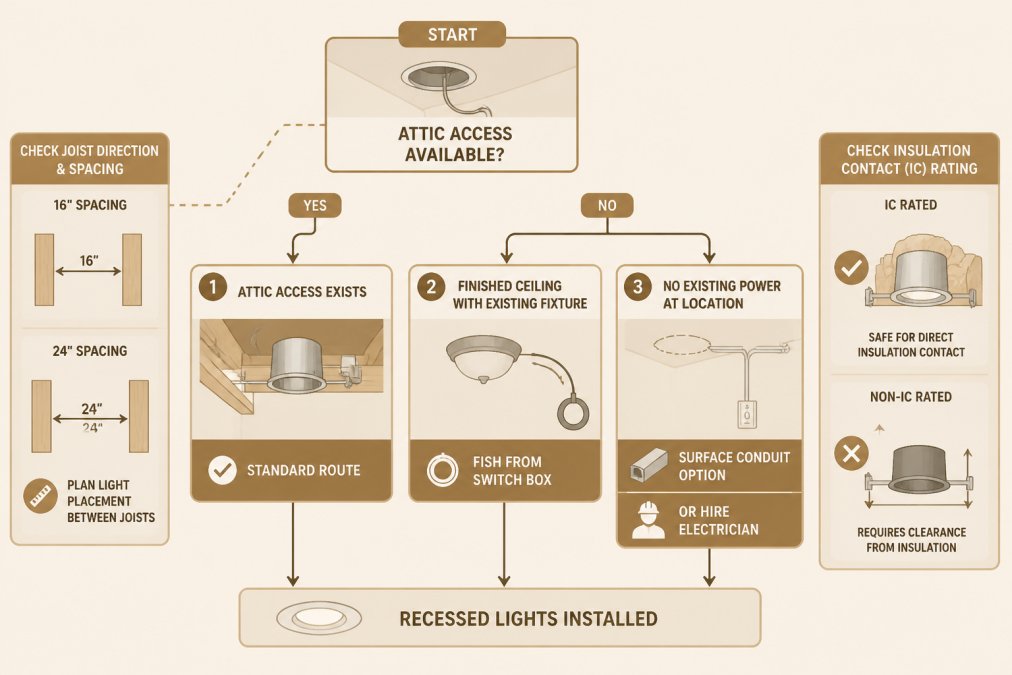
The core idea: work backward from the power source, not forward from your dream light positions. That single shift prevents most of the headaches.
Recessed Light Spacing and Layout
Recessed light spacing and layout follow one rule: the distance between lights should roughly match the ceiling height. An 8-foot ceiling needs lights about 8 feet apart.
Sketch the room on paper first. Mark each fixture, then check that every spot sits inside a joist bay, not on top of a joist, so you never cut a hole you cannot use.
Check Ceiling Joist Direction and Spacing
Joists are the wood beams above your drywall. Their direction decides which way you can fish cable. Find them with a stud finder, or tap the ceiling and listen for a solid thud.
Standard joist spacing runs 16 or 24 inches on center. Note the direction on your sketch. If joists run parallel to your planned wire path, you can fish straight down a bay.
Choose the Right Fixtures for a Finished Ceiling
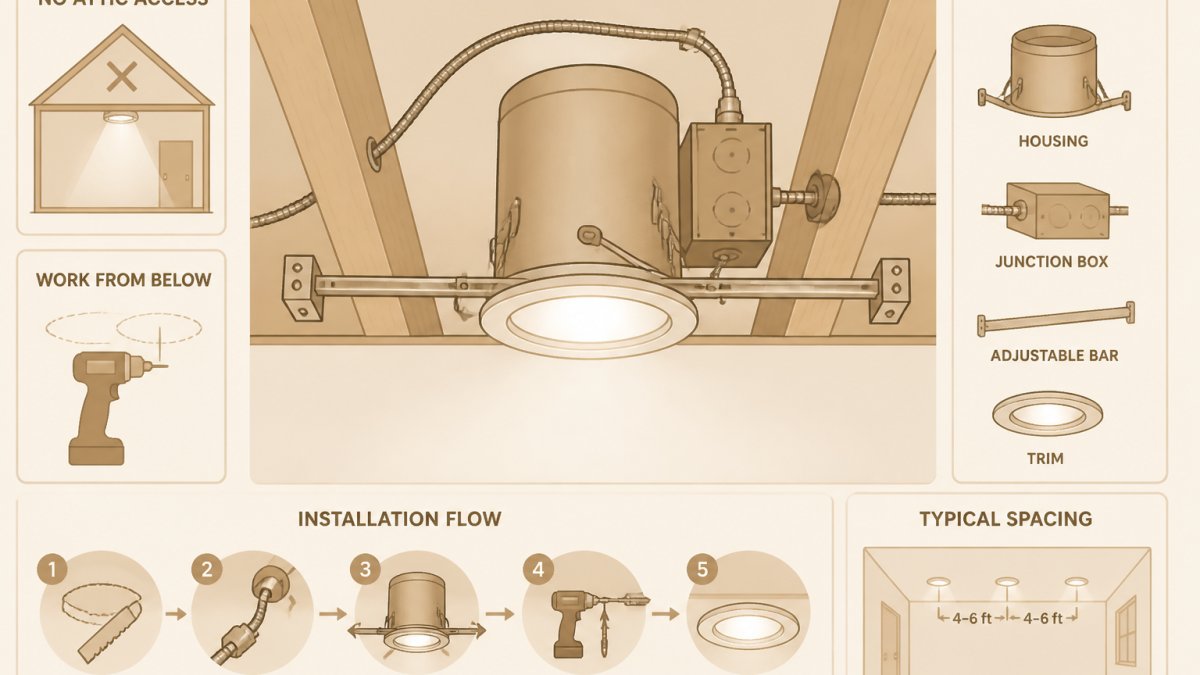
Canless LED lights are the best choice when there is no attic access. They need only a small round cutout, not a bulky housing that must fit between joists, making them easier to install from below.
Traditional remodel housings also work. They clip to the drywall through the same hole. But they take up more space in the joist bay, which can block your cable path.
Canless Recessed Lights Installation
Canless recessed lights installation is the simplest path for a finished ceiling. The steps are short:
- Cut a round hole sized to the fixture
- Pull the cable through the hole
- Wire the junction box to the fixture
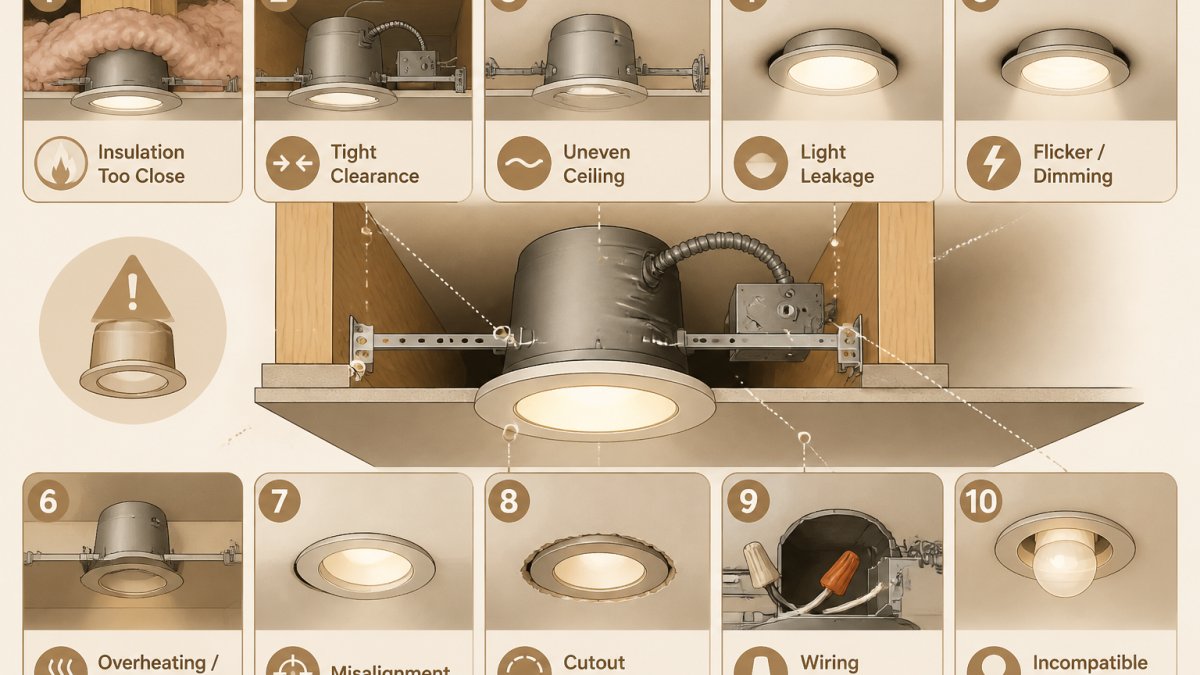
One thing to watch: check the insulation contact rating. A fixture marked "IC" can touch insulation. A non-IC fixture cannot. In a finished ceiling, you often cannot see what is above, so choose IC-rated lights to stay safe.
How to Run Wire for Recessed Lights Without Attic Access
Running cable in a finished ceiling is a routing problem, not a drilling problem. Before you cut anything, answer two questions: where is the nearest safe power, and which direction do the joists run? The answers pick your route.
Pick Your Power Source First
Work backward from power. There are four realistic sources, ranked from easiest to hardest:
- An existing ceiling fixture in the same room. Best case: you already have a box, a switched circuit, and a hole to fish from. Confirm the box is rated for the added load and the fixture isn't on a switched leg you can't extend.
- The wall switch box. The most common path in a finished room: fish up the wall cavity from the switch into the ceiling, then across the joist bays to each light. It works best when the switch is on an interior wall with an open stud bay above it.
- A nearby receptacle on the same circuit. Only viable if the circuit has spare capacity and the receptacle is on the same wall you're already fishing. Tapping it to feed ceiling lights is legal only when the circuit is rated for it and the box has room for the added conductors.
- A new circuit from the panel. This is the electrician's route. If no existing source is safe or close, stop and call a licensed electrician rather than daisy-chaining off a random outlet.
Fish Up the Wall, Then Across the Ceiling
The wall-to-ceiling transition is where most DIY attempts stall. The sequence that works:
- Drop the switch box or pull the switch out far enough to see the top plate of the stud bay.
- Drill the top plate with a flexible auger bit or a long ship auger, staying centered in the stud bay. Keep the hole sized to the cable, usually 5/8 inch for 12/2 or 14/2 NM-B, and at least 1-1/4 inches back from the edge of the plate.
- Feed fish tape or glow rods up through the drilled plate into the ceiling cavity; glow rods steer around insulation and past the first joist more easily.
Choose the Route Based on Joist Direction
Joist direction decides whether you can fish straight or whether you have to bore:
- Joists parallel to your wire path: fish straight down the bay. This is the clean route. No drilling through framing.
- Joists perpendicular to your wire path: you must bore through each joist the cable crosses, or reroute. Boring is legal within limits, keep holes centered, no larger than one-third the joist depth, and never in the top or bottom third. Check local code first; some jurisdictions add stricter limits.
- Joists running diagonally or with blocking: expect to open a small access hole. A 4-inch by 6-inch cut at a corner, patched later, is often faster than fighting a fish tape through blocking.
Tools That Actually Earn Their Keep
- Fish tape (steel or fiberglass): long, straight runs in open bays.
- Glow rods: short runs with bends, insulation, or a single obstruction to steer around.
- Flexible drill bit or ship auger: boring top plates and joists from below.
Cut Ceiling Openings and Fish Cable Through Joist Bays
Cutting and fishing is where the job either flows or fights you. The order: trace, cut, route, pull, connect.
Get your free electrical estimate →
- Trace each fixture location with a pencil and a template.
- Cut with a hole saw or drywall saw, using light pressure to avoid tearing paper.
- Route the fish tape from the power source toward the first hole.
- Pull the cable through, then repeat to the next light.
- Connect each fixture and secure the cable.
Keep cutouts clean. A ragged hole makes the trim sit crooked. Vacuum as you cut to keep dust out of the room.
Electrical Permits for Recessed Lighting and When to Hire an Electrician
Electrical permits for recessed lighting are usually required when you add new fixtures or new circuits. Rules vary by state and county, so check with your local building department before you start; skipping a permit can cost you at inspection or resale.
Hire a licensed electrician when:
- You need a new circuit or a panel change
- The existing wiring looks old, damaged, or undersized
- You cannot find a safe power source
A licensed pro handles the permit, the inspection, and the load math. That is often cheaper than fixing a failed inspection later.
Troubleshooting Blocked Joist Bays and Circuit Capacity
A blocked joist bay is the number one reason this job stalls. Insulation, ductwork, fire blocking, a diagonal brace, or a plumbing line can stop a fish tape cold. Do not force it, forcing bends the tape and can nick cable insulation. Diagnose first, then choose an alternative.
Diagnose the Block Before You Cut
- Push a glow rod into the bay and watch where it stops. A soft stop is usually insulation; a hard stop is framing, ductwork, or a fire block.
- Look through the fixture hole with a flashlight and a phone camera on a stick to spot the obstruction without opening the ceiling.
- Tap the ceiling along the bay. A hollow sound is open cavity; a solid thud is framing or blocking.
Alternatives When Fishing Fails
Try these in order, from least to most invasive:
- Switch to an adjacent joist bay. Often one bay over is clear; move the fixture a few inches rather than fight the obstruction.
- Steer around a soft obstruction with glow rods. Insulation and loose fill can be pushed aside; framing cannot.
- Bore a small access hole at the obstruction, typically 4 inches by 6 inches, fish through, then patch and paint. A clean patch is faster and cheaper than hours of failed fishing.
- Reroute along a wall or through a closet. Running cable down a wall, across a closet ceiling, and back up can bypass a blocked bay entirely.
- Use surface-mounted raceway. When the ceiling is fire-rated, plaster, or has no viable path, surface raceway (often called wiremold) is a code-compliant alternative. It is visible, but it avoids opening the ceiling and is accepted in many jurisdictions for retrofit work.
- Open and repair drywall. The last resort. A 12-inch by 12-inch cut at a corner, patched and painted, is often cheaper than an electrician's hourly rate for hours of fishing.
Circuit Capacity and Load Planning
Before you add fixtures, do the math:
- Find the circuit rating at the panel. A standard lighting circuit is 15 amps at 120 volts, which is 1,800 volt-amps. The code limit for a continuous load is 80 percent, or 1,440 volt-amps.
- Add up the existing load on that circuit, every light, fan, and receptacle already on it.
- Add your new fixtures. A modern LED recessed light typically draws 10 to 15 watts, so a dozen lights is only 120 to 180 watts. The fixtures are rarely the problem; the existing load is.
Dimmer Compatibility
LED fixtures and dimmers must be matched. A dimmer rated for incandescent loads may flicker, buzz, or fail with LEDs. Check the fixture's driver compatibility list and choose a dimmer rated for LED loads; with multiple fixtures on one dimmer, confirm total wattage is within its LED rating, not its incandescent rating.
National Electrical Code overview from NFPA sets the baseline for wiring, box fill, and cable protection. Local amendments add to it. When in doubt, have a licensed electrician review your plan and pull the right permits.
Conclusion
Installing recessed lighting without attic access is doable, but the margin for error is thin. One wrong hole or an overloaded circuit turns a weekend project into a repair bill.
Light Life Electric handles the whole job for you: layout, permits, wiring, and final inspection.
Get your free electrical estimate and let our certified electricians install your recessed lighting safely and to code.
Frequently Asked Questions
Can you install recessed lighting without an attic?
Yes, you can install recessed lighting without attic access by using the existing ceiling cavity. The most common method is to fish electrical cable from an existing switch box or ceiling fixture through the joist bays. You will need to cut small openings for the new lights and possibly an access hole for fishing. Canless recessed lights are ideal because they require only a small cutout and no bulky housing. Always turn off power and verify the circuit is de-energized before starting.
What type of recessed lights work without attic access?
Canless recessed lights, also known as wafer lights, work best without attic access. They are ultra-thin and install through a small ceiling cutout, often as little as 3 to 6 inches in diameter. These fixtures have integrated LED drivers and junction boxes that fit inside the ceiling cavity. Look for IC-rated and airtight models if insulation is present. They also allow for easy daisy-chaining, which simplifies wiring in tight spaces.
Do recessed lights need to be IC-rated?
IC-rated recessed lights are required when the fixture will be in direct contact with insulation. In finished ceilings without attic access, you may not know if insulation is present. To be safe, choose IC-rated fixtures, which are designed to prevent overheating and fire hazards. Non-IC-rated lights must have at least 3 inches of clearance from insulation. Canless LED lights are often IC-rated and airtight, making them a safe choice for retrofit installations.
How much would an electrician charge to install recessed lighting?
The cost to install recessed lighting varies based on the number of lights, ceiling type, and local labor rates. For finished ceilings without attic access, expect higher labor due to fishing cable and patching drywall. Many electricians charge per fixture or by the hour. Light Life Electric provides free estimates for recessed lighting projects in Southwest Florida. Contact us for a quote tailored to your home's specific conditions and layout.