 how-to
How to Avoid Common Recessed Lighting Installation Problems
Table of Contents
- How to Avoid Common Recessed Lighting Installation Problems
- How to Space Recessed Lights Correctly
- Measuring and Cutting Ceiling Openings to the Right Size
- Checking for Obstructions and Planning Your Layout
- Why Recessed Lights Not Sitting Flush: Causes and Fixes
- Recessed Lighting Insulation Clearance Requirements
- Canless Recessed Lighting Installation Best Practices
- Electrical Connections and Safety Precautions
- Frequently Asked Questions
Last Updated: October 10, 2026
How to Avoid Common Recessed Lighting Installation Problems
Recessed lighting transforms a room's look and feel. But installation mistakes can ruin the effect. Fixtures sit crooked, wires don't reach, holes are the wrong size. These problems waste time and money.
Most recessed lighting installation problems are preventable. The good news: most issues are preventable. This guide walks you through the planning, installation, and safety steps that keep your recessed lighting looking sharp and working safely.
The biggest mistakes happen before the first hole gets cut. Poor spacing, wrong measurements, and skipped safety checks lead to loose fixtures, fire hazards, and expensive rework. We'll show you exactly how to avoid each one.
How to Space Recessed Lights Correctly
Space recessed lights evenly across your ceiling for balanced illumination. The standard rule is simple: place lights at a distance from the wall equal to half the distance between fixtures.
If your fixtures are 6 feet apart, set them 3 feet from the wall. For 8-foot spacing, place lights 4 feet from walls. This creates a clean, symmetrical layout that looks intentional, not random.
Start by measuring your room length and width. Divide by your desired spacing interval. Round down to get a whole number of fixtures. Then recalculate the actual spacing to fit evenly.
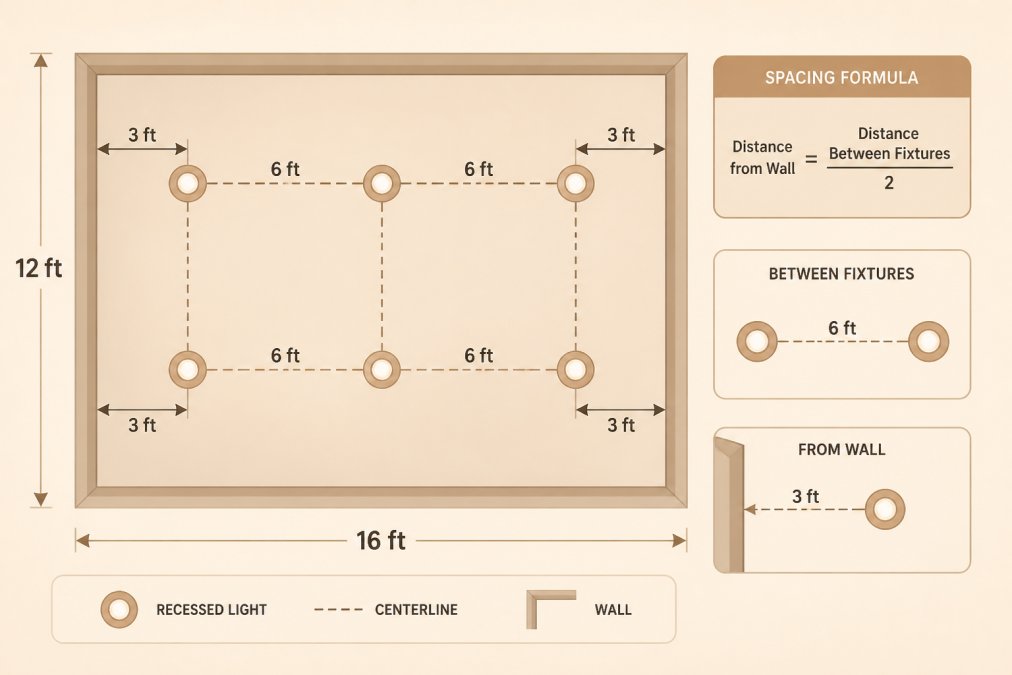
Most rooms need fixtures 4 to 6 feet apart for task lighting. Accent lighting can be wider. Mark your layout on the ceiling with a pencil before cutting any holes. This prevents costly repositioning mid-project.
Measuring and Cutting Ceiling Openings to the Right Size
Cutting the wrong size hole is one of the most common recessed lighting installation problems. A hole that's too small won't accept the housing. A hole that's too large leaves gaps the trim ring cannot cover, causing light leaks, dust accumulation, and a visibly unfinished appearance.
Determine the correct opening size. Check your fixture's specification sheet for the required trim ring diameter. Standard recessed lights use 4-inch openings (for 4-inch trim rings) or 6-inch openings (for 6-inch trim rings). Some specialty fixtures use 3-inch or 8-inch openings. Write down the exact diameter required, do not estimate.
Account for drywall thickness. The trim ring sits on top of the drywall. If your ceiling is thicker than standard (typically 1/2 inch), the trim ring may not sit flush. Measure your ceiling thickness with a drill bit or caliper. Confirm that your fixture's trim ring is rated for your ceiling thickness.
Mark the hole center precisely. Use a pencil to mark the center point of each fixture location. Double-check this mark against your layout plan. Measure the distance from the wall and from adjacent marks to confirm accuracy. A misplaced hole wastes material and forces repositioning.
Cut slowly and straight. Use a drywall saw or hole saw that matches your required opening size exactly. Cut perpendicular to the ceiling surface. Jagged or angled cuts weaken the drywall and make it harder for the trim ring to sit flush.
Test-fit before finishing. Before taping, mudding, or painting the ceiling, insert the fixture housing into the hole. The housing should slide in smoothly with minimal resistance. The trim ring should sit flat against the drywall with no gaps or tilting.
Correct oversized or misplaced holes. If you cut a hole too large, do not attempt to force the fixture in or use shims to compensate. Instead, patch the hole with a drywall patch kit or scrap drywall secured with joint compound and tape. Sand smooth once dry, then cut a new hole at the correct size nearby.
Avoid cutting into structural members or utilities. Before cutting, use a stud finder to locate ceiling joists. Recessed light housings need at least 3 inches of clearance from framing members. Mark joist locations on your ceiling layout and adjust fixture positions to avoid them.
Checking for Obstructions and Planning Your Layout
Look up before you cut. Check for joists, pipes, ducts, and existing wiring in the ceiling cavity. These obstructions force you to reposition fixtures or adjust spacing.
Use a stud finder to locate joists. Mark them on your ceiling layout. Recessed light housings need 3 inches of clearance from framing members. Cramped spacing creates heat buildup and fire risk.
Scan for plumbing and HVAC runs. A water line or duct in the wrong spot kills your layout plan. Adjust fixture positions to work around them. This takes time upfront but saves hours of rework.
Check for existing wiring. If your ceiling already has electrical boxes or cables, plan new fixtures to avoid them. Running new circuits may be necessary. This is where a professional electrician can provide assistance.
Why Recessed Lights Not Sitting Flush: Causes and Fixes
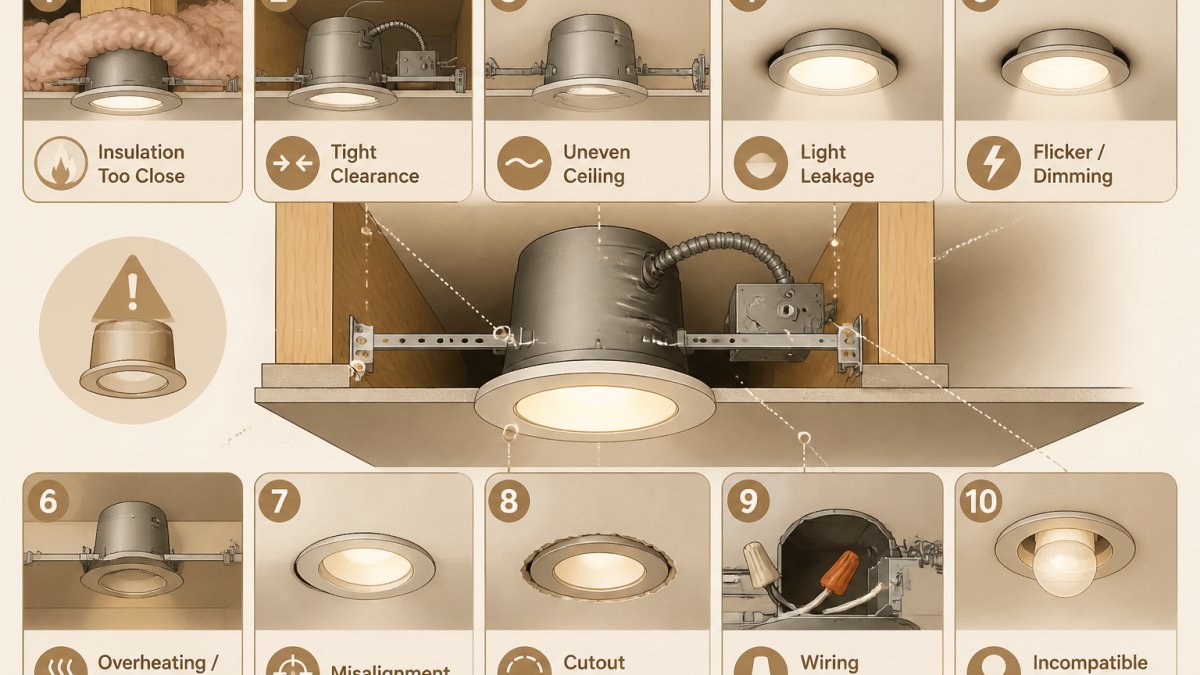
Recessed lights not sitting flush against the ceiling look unfinished. The gap collects dust and light leaks around the trim. Common causes include drywall thickness, uneven joists, or a fixture housing that's too deep for the cavity.
Drywall thickness matters. Standard drywall is half an inch thick. Some older homes use thicker material. Measure your ceiling thickness and confirm your fixture trim ring matches it. A mismatch creates a gap.
Get your free electrical estimate →
Uneven joists cause the ceiling to slope slightly. This tilts the fixture. Shim the housing with thin metal plates to level it. Adjust until the trim ring sits flat and the fixture body is plumb.
If the housing is too deep, it sits too far down in the cavity. Check the rough-in depth against your ceiling cavity depth. A fixture designed for 4-inch cavities won't work in a 3-inch space. Choose the right housing depth for your application.
Recessed Lighting Insulation Clearance Requirements
Insulation and recessed lights don't mix. Heat from the bulb can ignite insulation if they touch. Building codes require 3 inches of clearance around the housing. Some codes demand more.
Check your local electrical code for exact requirements. Most jurisdictions follow the National Electrical Code, which specifies clearance distances. Non-insulated housings have fewer restrictions than insulated ones.
If your attic has existing insulation, pull it back 3 inches from the housing on all sides. Don't let it pile against the light. Use a barrier or insulation dam if needed. This prevents fire risk and reduces heat loss.
For recessed lighting insulation clearance, the housing itself gets hot. Insulation touching hot metal creates a fire hazard. Test your housing temperature after running it for an hour. It should be warm, not hot enough to burn your hand.
Canless Recessed Lighting Installation Best Practices
Canless recessed lighting (also called direct-connect fixtures) simplifies installation. No separate housing to rough-in. The trim and driver connect directly to ceiling framing.
Canless fixtures mount faster and fit in tight spaces. They work well in shallow cavities where traditional housings don't fit. But they still need proper support and electrical connection.
Secure the fixture to the framing with the included brackets. Don't rely on drywall alone. The fixture weight needs solid support. Loose mounting creates vibration and fire risk over time.
For canless recessed lighting installation, follow the manufacturer's wiring diagram exactly. These fixtures have integrated drivers. Wrong connections damage the electronics. Test the light before closing up the ceiling.
Electrical Connections and Safety Precautions
Turn off power and verify the circuit is dead. Before touching any wiring, switch off the breaker that controls the circuit. Use a non-contact voltage tester or insulated screwdriver to confirm that no current is flowing. Test the tester on a live outlet first to verify it's working. Never assume a circuit is dead based on a breaker label alone, verify it yourself.
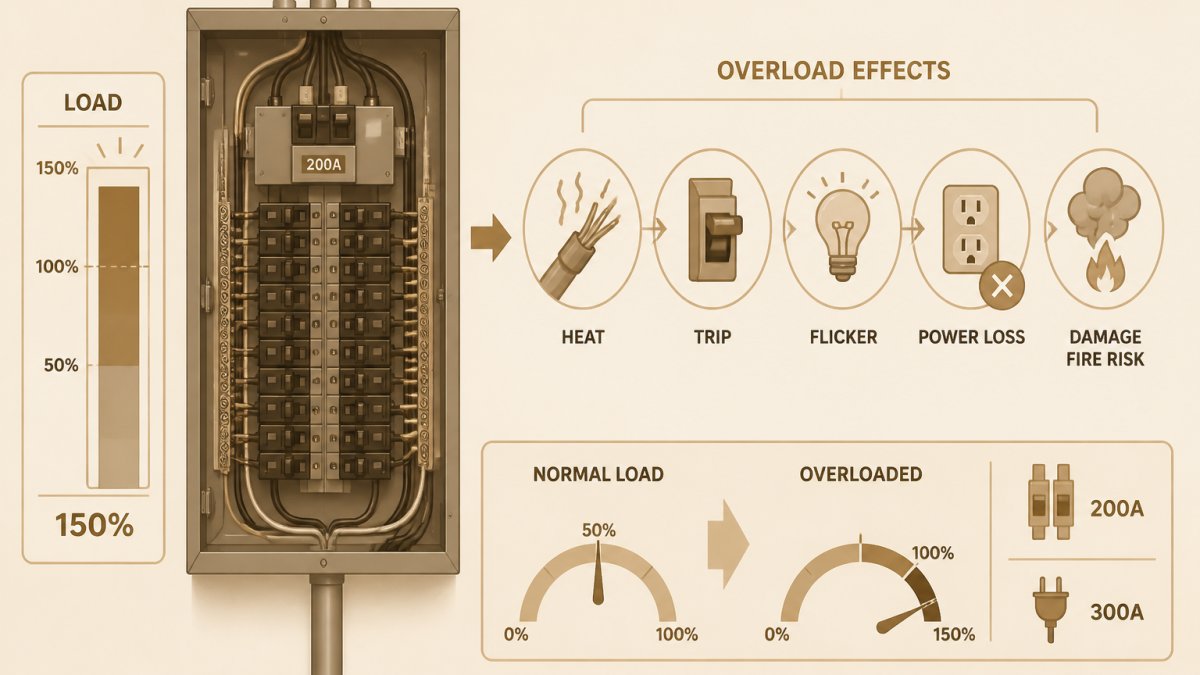
Understand your circuit capacity. Recessed lights draw power from your home's electrical panel. Before adding new fixtures, confirm that the circuit has available capacity. A standard 15-amp circuit can safely handle about 1,440 watts. A 20-amp circuit can handle about 1,920 watts. If your new fixtures plus existing loads exceed this, you need a dedicated circuit.
Check dimmer and LED compatibility. If you plan to use dimmable recessed lights, confirm that your dimmer switch is compatible with LED fixtures. Not all dimmers work with all LED drivers. Incompatible combinations cause flickering, buzzing, or complete failure. Check the fixture's specification sheet for dimmer compatibility.
Connect fixture wiring securely. Twist the fixture's hot wire (typically black) to the circuit's hot wire. Twist the fixture's neutral wire (typically white) to the circuit's neutral wire. Twist the fixture's ground wire (typically bare copper or green) to the circuit's ground wire. Once twisted, screw a wire nut clockwise onto each connection until it is tight.
Use the correct wire nut size and material. Wire nuts are rated by the gauge and number of wires they accommodate. A wire nut that's too small will not grip the wires securely; one that's too large will leave gaps. If your home has aluminum wiring, use aluminum-rated wire nuts.
Manage excess wire neatly. Coil any excess fixture wire and secure it with clips or ties. Do not let it hang loose or rest against hot components such as the fixture housing or transformer. Proper wire management prevents insulation damage, reduces fire risk, and makes future maintenance easier.
Test each fixture after installation. Once all connections are complete and the junction box is secured, switch the breaker back on. Turn on the light switch and verify that each fixture illuminates. Lights should turn on and off smoothly with no flickering, buzzing, or delay. Flickering indicates a loose connection or dimmer incompatibility and requires immediate attention.
Frequently Asked Questions
How far apart should recessed lights be spaced?
Spacing depends on ceiling height and desired brightness. A common rule is to space recessed lights 4 to 6 feet apart for standard 8-foot ceilings. Set the first fixture 3 feet from the wall (half the distance between fixtures). For lower ceilings or brighter output, reduce spacing to 3 to 4 feet. For higher ceilings or ambient lighting, 6 to 8 feet works. Always check your fixture's beam angle and lumen output, the manufacturer's recommendations override general spacing rules.
Why won't my recessed light sit flush with the ceiling?
Fixtures that won't sit flush usually have one of three causes: the ceiling cutout is oversized, the spring clips are damaged or misaligned, or the fixture housing is warped. First, check that the cutout diameter matches your fixture's trim ring exactly, even 1/8 inch too large will cause gaps. If the cutout is correct, inspect the spring clips; they should grip the drywall firmly without bending. If clips are bent, replace the fixture. If the housing itself is bent, the fixture is defective and should be replaced.
Can recessed lights be installed in an insulated ceiling?
Yes, but only if you use IC-rated (insulation contact) fixtures designed for this purpose. Standard non-IC fixtures must be kept 3 inches away from insulation to prevent heat buildup and fire risk. If your ceiling has insulation and you're installing standard fixtures, you must create a sealed box around each fixture or use canless recessed lights designed for insulated ceilings. Always verify your fixture's rating before installation, it will be clearly marked on the housing.
When should I call a licensed electrician for recessed lighting installation?
Call an electrician if you're running new circuits, working with existing wiring you're unsure about, installing more than 4 fixtures on one circuit, dealing with aluminum wiring, or if you're uncomfortable turning off power at the breaker. Also call if the junction box is damaged, if you don't have an attic or accessible space above the ceiling, or if you encounter any shock hazard. A licensed electrician can help ensure your installation meets code, passes inspection, and keeps your home safe.