 how-to
How to Prepare for a Residential Electrical Safety Inspection
Table of Contents
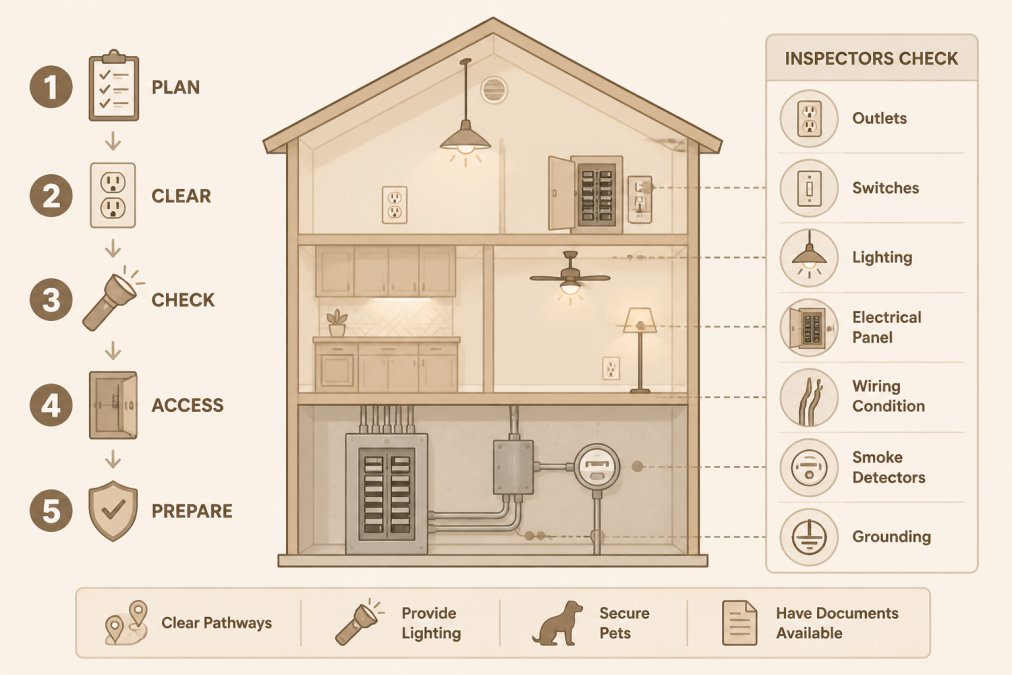
- What Happens During a Residential Electrical Safety Inspection
- Create Your Electrical Safety Inspection Checklist
- How Long Does an Electrical Inspection Take
- Common Electrical Code Violations to Address Before Inspection
- Gather Documentation and Maintenance Records
- Prepare Access and Clear the Inspection Area
- Schedule Your Inspection and Know What Comes Next
- Frequently Asked Questions
Last Updated: September 24, 2026
What Happens During a Residential Electrical Safety Inspection
An electrical safety inspection is a comprehensive evaluation of your home's electrical system. A licensed electrician examines circuits, wiring, outlets, switches, and safety devices to identify hazards, code violations, fire risks, and shock hazards.
Create Your Electrical Safety Inspection Checklist
A pre-inspection checklist helps you identify problems and prepare your home so the inspector can work efficiently. This self-assessment highlights areas needing attention and demonstrates your commitment to electrical safety.
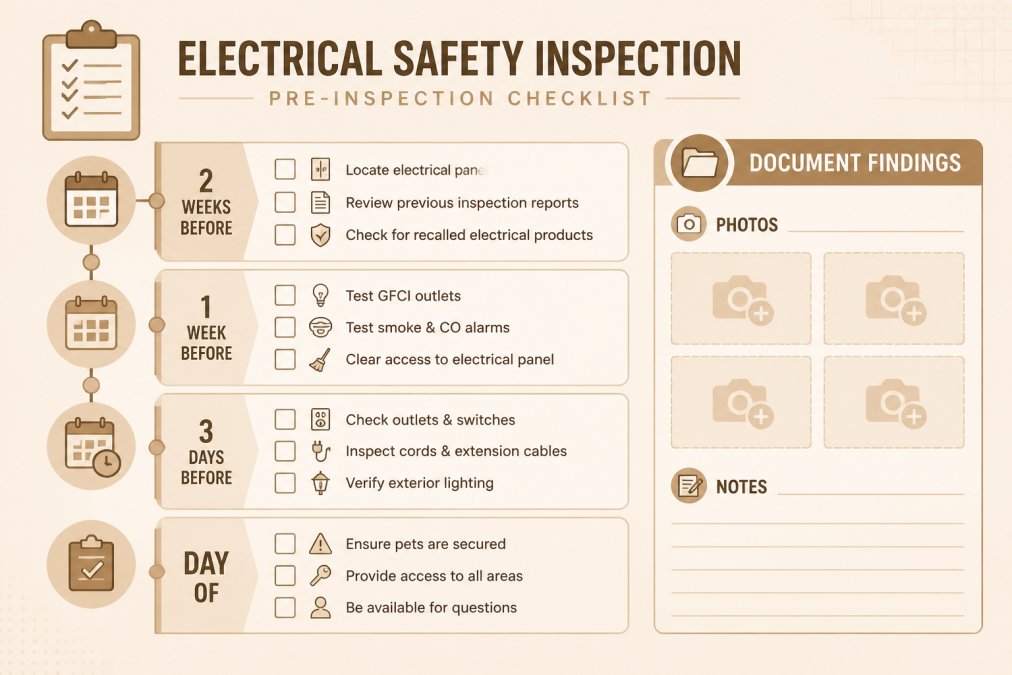
Two Weeks Before Inspection
- Schedule your inspection and confirm the date and time
- Locate your electrical panel and ensure the area is clear of storage, furniture, or clutter
- Identify the location of your main water shut-off and gas shut-off valves (inspectors may need to verify bonding)
- Gather all previous inspection reports, electrical permits, and maintenance records
- Take photos of your electrical panel, circuit breaker labels, and any visible damage to wiring or outlets
One Week Before Inspection
- Walk through your home and document the condition of all visible cords and cables
- Test each RCD/RCBO safety switch by pressing the test button; document which ones trip and which ones fail
- Check all outlets with an inexpensive outlet tester (available at any hardware store for $10-$20) and note any that fail polarity tests
- Inspect your electrical panel for signs of overheating, burn marks, or discoloration around breaker switches
- Look for double-tapped breakers (two wires connected to a single breaker) and document their location
- Check for any breakers that trip frequently or feel warm to the touch
Three Days Before Inspection
- Clear the area around your electrical panel completely, remove boxes, tools, and any stored items within 3 feet
- Ensure attic access is safe and unobstructed; remove insulation or storage blocking the entrance
- Move items away from basement walls and crawl space entrances where wiring runs
- Unlock any gates, exterior panels, or locked areas that contain electrical components
- Secure pets in a separate area so they won't interfere with the inspection
Day of Inspection
- Ensure adequate lighting in dark areas like basements, attics, and crawl spaces
- Turn off alarm systems that might be triggered during testing
- Have your documentation and photos ready to show the inspector
- Be available to answer questions about recent electrical work, renovations, or equipment upgrades
- Provide the inspector with a list of any areas you're concerned about or any electrical issues you've noticed
Common Issues to Document During Your Pre-Inspection Walk-Through
Cord and Cable Problems:
- Frayed or cracked insulation on power cords
- Cords running under rugs, carpets, or furniture
- Multiple cords bundled tightly together without proper management
- Damaged extension cords or surge protectors
- Cords with exposed wiring or visible bare copper
- Cords in kitchens or bathrooms showing signs of moisture damage
Outlet and Switch Issues:
- Outlets with burn marks, dark discoloration, or scorch marks
- Loose or cracked outlet covers and switch plates
- Missing outlet covers in hallways, living areas, or bedrooms
- Outlets that don't hold plugs securely or feel loose when inserting plugs
- Switches that don't operate smoothly or feel sticky
- Outlets installed upside down without clear labeling or purpose
Panel and Breaker Concerns:
- Breakers that appear damaged, burned, or discolored
- Breakers that trip frequently (more than once per month)
- Double-tapped breakers with two wires on a single breaker
- Missing knockouts or exposed openings in the panel
- Water damage, corrosion, or rust inside the panel
- Breaker labels that are illegible or missing
Safety Switch Problems:
- RCD or RCBO devices that fail the test button (don't trip immediately)
- Safety switches in bathrooms, kitchens, or outdoor areas that are missing or nonfunctional
- Switches that are difficult to access or blocked by furniture
How Long Does an Electrical Inspection Take
A typical residential electrical safety inspection takes 2 to 4 hours, depending on your home's size and system complexity.
Common Electrical Code Violations to Address Before Inspection
Understanding the most frequent code violations helps you prioritize repairs. The National Electrical Code (NEC) sets minimum safety standards, and inspectors use it as their baseline.
Missing or Nonfunctional GFCI/RCD Protection (Most Common Fail)
What inspectors test:
- They press the test button on every GFCI outlet and RCD switch
- The device must trip immediately when tested
- They verify GFCI outlets are in correct locations per code
What you can do before inspection:
- Test every GFCI outlet and RCD switch by pressing the test button
- If a device doesn't trip, it fails inspection and must be replaced
- Contact a licensed electrician if outlets lack GFCI protection
Ungrounded Outlets (Two-Prong Outlets in Three-Prong Locations)
What inspectors check:
- They visually identify two-prong outlets in locations requiring three-prong
- They use an outlet tester to verify grounding on three-prong outlets
What you can do before inspection:
- Use an inexpensive outlet tester ($10-$20) to check polarity and grounding on all outlets
- Document which outlets fail the test
- Contact a licensed electrician for outlet replacement or grounding upgrades
Damaged, Frayed, or Deteriorated Wiring Insulation
What inspectors look for:
- Visible copper wire showing through cracked or missing insulation
- Hardened, brittle, or discolored insulation
- Burn marks or melting on wire insulation
- Rodent damage to wiring in attics or crawl spaces
What you can do before inspection:
Get your free electrical estimate →
- Walk through your attic and crawl spaces with a flashlight and look for visible damage to wiring
- Take photos of any damaged insulation
- Contact a licensed electrician to replace damaged wiring
Double-Tapped Breakers (Two Wires on One Breaker)
What inspectors check:
- They visually inspect each breaker in your electrical panel
- They count the number of wires connected to each breaker
- They note any breakers with two wires connected
What you can do before inspection:
- Look at each breaker in your electrical panel (do not touch)
- Document any breakers with two wires connected
- Contact a licensed electrician to add a new breaker and separate the circuits
Overloaded Circuits and Frequent Breaker Trips
What inspectors assess:
- They ask if any breakers trip frequently
- They check for signs of overheating around outlets or the panel
- They verify circuits are properly distributed throughout the home
What you can do before inspection:
- Document any breakers that trip more than once per month
- Note which appliances or outlets are on circuits that trip
- Contact a licensed electrician to add additional circuits
Missing or Loose Grounding and Bonding
What inspectors verify:
- They check that the service entrance has proper grounding
- They verify that metal gas lines and water pipes are bonded to the electrical system
- They inspect grounding connections for corrosion, looseness, or damage
What you can do before inspection:
- Visually inspect grounding connections at your electrical panel (do not touch)
- Take photos of any visible grounding issues
- Contact a licensed electrician to repair loose or corroded grounding connections
Safe for Homeowners:
- Test GFCI outlets and RCD switches
- Use an outlet tester to check polarity and grounding
- Visually inspect cords, cables, and wiring for damage
- Document findings with photos
- Clear access areas around the electrical panel and attic
- Organize maintenance records and previous inspection reports
Requires a Licensed Electrician:
- Replacing damaged wiring or insulation
- Installing or repairing GFCI outlets
- Adding new circuits or breakers
- Separating double-tapped breakers
- Repairing grounding or bonding connections
- Replacing outlets or switches
- Any work inside the electrical panel
Gather Documentation and Maintenance Records
Prepare all electrical documentation before your inspection, including previous inspection reports, permits for electrical work, and maintenance records. This helps the inspector understand your system's history.
Collect these documents:
- Previous electrical inspection reports or certificates
- Permits for any electrical work completed
- Receipts for panel upgrades or circuit additions
- Maintenance records for HVAC systems with electrical components
- Warranties on surge protectors or safety devices
- Photos of any electrical work you've noticed
Prepare Access and Clear the Inspection Area
Make your home accessible for a thorough inspection. The electrician needs clear access to the electrical panel, attic, crawl spaces, basement, and exterior components.
Preparation steps:
- Clear the area around your electrical panel
- Ensure attic access is safe and unobstructed
- Move items away from basement walls where wiring runs
- Keep pets secured in a separate area during the inspection
- Unlock gates or exterior panels that protect outdoor electrical components
- Turn off alarm systems that might interfere with the inspection
- Provide adequate lighting in dark areas like basements or crawl spaces
Schedule Your Inspection and Know What Comes Next
Contact a licensed electrician to schedule your electrical safety inspection. Contact a licensed electrician to schedule your electrical safety inspection.
After your inspection, you'll receive a detailed report listing:
- All code violations found
- Safety hazards requiring immediate attention
- Recommended repairs and upgrades
- Timeline for completing remedial works
- Estimated costs for necessary repairs
Frequently Asked Questions
What should I check before my electrical safety inspection?
Start with a visual inspection of all visible cords, cables, and wiring for fraying or damage. Test your RCD and RCBO safety switches to confirm they work. Check your circuit breaker panel for signs of corrosion, loose connections, or scorch marks. Inspect outlets and switches for cracks, discoloration, or loose faceplates. Look for grounding issues and ensure no circuits are overloaded. Document any previous repairs or upgrades. Having this checklist completed before the inspector arrives shows diligence and may help identify issues you can address beforehand.
How long does an electrical safety inspection take?
Most residential electrical safety inspections take 1 to 3 hours, depending on your home's size, age, and complexity of the electrical system. Older homes with outdated wiring may take longer. A single-family home typically falls toward the lower end, while larger properties or those with multiple panels may require more time. The inspector will need access to your electrical panel, attic, basement, and crawl spaces. Plan for the appointment to take at least 2 hours to be safe, and ensure someone is home to grant access to all areas.
What are the most common electrical code violations found during inspections?
Frequent violations include frayed or damaged insulation on wiring, improper grounding or bonding of metal casing and electrical components, overloaded circuits that create fire prevention risks, missing or damaged outlet covers, and RCD/RCBO devices that fail testing. Outdated wiring that doesn't meet current electrical safety standards is also common in older homes. Voltage and load testing often reveal circuits operating beyond safe capacity. Many of these issues require remedial works to bring your system into compliance. Addressing them before inspection demonstrates your commitment to electrical safety and code compliance.
Do I need to be home during an electrical safety inspection?
Yes, you should be home during the inspection. The inspector needs access to your electrical panel, breaker box, attic, basement, crawl spaces, and all areas where wiring runs. They may ask you questions about recent electrical work, renovations, or troubleshooting issues you've experienced. Being present allows you to discuss any concerns, learn about your system's condition, and receive the certification report directly. If you cannot be home, arrange for a trusted representative to grant full access and answer questions about the property's electrical history and maintenance records.